Knative on EKS
이번에는 Knative를 EKS에 구성해보려고 한다. 4월은 발표 및 여러가지 업무로 인해서 포스팅을 할 시간이 부족했지만 5월부터 조금씩 여유가 생겨서 더 바빠지기전에 좀 써보려고 한다. 사실 Facebook @최용호님께서 한번 해보는것도 좋겠다고 하셔서 테스트를 진행하였다.
Knative on EKS
제목만 보면 Lambda나 ECS, Batch 서비스가 있는데 왜 이걸 써야하지? 라는 생각부터 하는 사람도 있을것 같다. 하지만 이전 포스팅들과 발표에서도 여러번 이야기 한것처럼 Knative는 간단하게 서버리스 워크로드를 ��빌드, 배포, 관리하기 위한 Kubernetes기반 FaaS플랫폼이고 현재 CNCF Landscape에서 가장 빠른 속도로 개발되고 있는 오픈소스 프로젝트 중 하나이다.
EKS 배포
앞선 eksworkshop 포스팅에서처럼 간단한 배포를 위해 eksctl로 2-node 클러스터를 배포한다.
사전 준비사항은 이전 포스팅이나 https://eksctl.io/을 참고하자.
$ eksctl create cluster --name=eksworkshop-eksctl --nodes=2 --node-ami=auto
생성된 클러스터 상태를 확인한다.
$ kubectl get nodes
NAME                                                STATUS    ROLES     AGE       VERSION
ip-192-168-24-168.ap-northeast-2.compute.internal   Ready     <none>    2m        v1.11.9
ip-192-168-78-204.ap-northeast-2.compute.internal   Ready     <none>    2m        v1.11.9
istio 설치
Knative는 istio 의존성을 가지고 있기 때문에 Istio를 먼저 배포한다. 물론 이전 포스팅에서 설명한것 처럼 Gloo를 사용해도 되지만 이번에는 Istio를 설치하였다.
$ kubectl apply -f https://github.com/knative/serving/releases/download/v0.5.0/istio-crds.yaml
$ kubectl apply -f https://github.com/knative/serving/releases/download/v0.5.0/istio.yaml
배포된 Pods, Services, Replicasets 을 확인한다.
$ kubectl get pods -n istio-system
NAME                                     READY     STATUS      RESTARTS   AGE
cluster-local-gateway-65c8b667c8-269cf   1/1       Running     0          17m
istio-citadel-76bd44d8f7-5cltj           1/1       Running     0          17m
istio-cleanup-secrets-7jpth              0/1       Completed   0          17m
istio-egressgateway-b9d56b4f8-pdjhs      1/1       Running     0          17m
istio-galley-7db7db89db-5stkp            1/1       Running     0          17m
istio-ingressgateway-f77fbc787-npw9d     1/1       Running     0          17m
istio-pilot-69f975bf4f-4dq4d             2/2       Running     0          17m
istio-pilot-69f975bf4f-q9g8g             2/2       Running     0          16m
istio-pilot-69f975bf4f-tnm92             2/2       Running     0          16m
istio-policy-8db48cbcd-dl2th             2/2       Running     0          17m
istio-security-post-install-xv8z6        0/1       Completed   0          17m
istio-sidecar-injector-cd54ffccd-kj2n6   1/1       Running     0          17m
istio-telemetry-d78cd45db-8x2cw          2/2       Running     0          17m

$ kubectl get svc -n istio-system
NAME                     TYPE           CLUSTER-IP       EXTERNAL-IP                                                                   PORT(S)                                                                                                                   AGE
cluster-local-gateway    ClusterIP      10.100.97.146    <none>                                                                        80/TCP,443/TCP,31400/TCP,15011/TCP,8060/TCP,15030/TCP,15031/TCP                                                           17m
istio-citadel            ClusterIP      10.100.147.235   <none>                                                                        8060/TCP,9093/TCP                                                                                                         17m
istio-egressgateway      ClusterIP      10.100.25.44     <none>                                                                        80/TCP,443/TCP                                                                                                            17m
istio-galley             ClusterIP      10.100.158.45    <none>                                                                        443/TCP,9093/TCP                                                                                                          17m
istio-ingressgateway     LoadBalancer   10.100.62.157    a4e1d5201758f11e9b7f402c4d4b0376-510368564.ap-northeast-2.elb.amazonaws.com   80:31000/TCP,443:30753/TCP,31400:31922/TCP,15011:31331/TCP,8060:30389/TCP,853:30257/TCP,15030:30827/TCP,15031:30153/TCP   17m
istio-pilot              ClusterIP      10.100.25.194    <none>                                                                        15010/TCP,15011/TCP,8080/TCP,9093/TCP                                                                                     17m
istio-policy             ClusterIP      10.100.73.149    <none>                                                                        9091/TCP,15004/TCP,9093/TCP                                                                                               17m
istio-sidecar-injector   ClusterIP      10.100.117.18    <none>                                                                        443/TCP                                                                                                                   17m
istio-telemetry          ClusterIP      10.100.87.12     <none>                                                                        9091/TCP,15004/TCP,9093/TCP,42422/TCP                                                                                     17m

$ kubectl get rs -n istio-system
NAME                               DESIRED   CURRENT   READY     AGE
cluster-local-gateway-65c8b667c8   1         1         1         17m
istio-citadel-76bd44d8f7           1         1         1         17m
istio-egressgateway-b9d56b4f8      1         1         1         17m
istio-galley-7db7db89db            1         1         1         17m
istio-ingressgateway-f77fbc787     1         1         1         17m
istio-pilot-69f975bf4f             3         3         3         17m
istio-policy-8db48cbcd             1         1         1         17m
istio-sidecar-injector-cd54ffccd   1         1         1         17m
istio-telemetry-d78cd45db          1         1         1         17m
Istio injection을 하기 위해 배포할 defaults namespace 전체에 Labeling을 한다.
$ kubectl label namespace default istio-injection=enabled
namespace/default labeled

$ kubectl get namespaces --show-labels
NAME           STATUS    AGE       LABELS
default        Active    43m       istio-injection=enabled
istio-system   Active    27m       istio-injection=disabled
kube-public    Active    43m       <none>
kube-system    Active    43m       <none>
Knative 설치
build, evening, serving 및 모니터링 리소스를 배포한다.
kubectl apply -f https://github.com/knative/serving/releases/download/v0.5.0/serving.yaml \
   -f https://github.com/knative/build/releases/download/v0.5.0/build.yaml \
   -f https://github.com/knative/eventing/releases/download/v0.5.0/release.yaml \
   -f https://github.com/knative/eventing-sources/releases/download/v0.5.0/eventing-sources.yaml \
   -f https://github.com/knative/serving/releases/download/v0.5.0/monitoring.yaml \
   -f https://raw.githubusercontent.com/knative/serving/v0.5.0/third_party/config/build/clusterrole.yaml
모든 Knative namespaces 및 resources를 확인한다.
$ kubectl get namespaces | grep knative
knative-build        Active    8m
knative-eventing     Active    8m
knative-monitoring   Active    8m
knative-serving      Active    8m
knative-sources      Active    8m

$ kubectl get pods -n knative-serving
NAME                          READY     STATUS    RESTARTS   AGE
activator-664b5b9598-dsjvq    2/2       Running   0          10m
autoscaler-64d5bd84b8-bqghq   2/2       Running   0          10m
controller-658b9d5c6c-tnwvz   1/1       Running   0          10m
webhook-5dffbfbb8b-525vt      1/1       Running   0          10m

$ kubectl get pods -n knative-build
NAME                                READY     STATUS    RESTARTS   AGE
build-controller-86f5b5b96d-zg8j2   1/1       Running   0          11m
build-webhook-6fddd7c6df-68fkw      1/1       Running   0          11m

$ kubectl get pods -n knative-eventing
NAME                                            READY     STATUS    RESTARTS   AGE
eventing-controller-6fdccd8c95-bckws            1/1       Running   0          11m
in-memory-channel-controller-6fddb6655f-vbc64   1/1       Running   0          11m
in-memory-channel-dispatcher-7684cd7c7d-ftqhc   2/2       Running   2          11m
webhook-d496c66bd-688xz                         1/1       Running   0          11m
$ kubectl get pods -n knative-monitoring
NAME                                  READY     STATUS    RESTARTS   AGE
elasticsearch-logging-0               1/1       Running   0          14m
elasticsearch-logging-1               1/1       Running   0          12m
grafana-754bc795bb-wxwml              1/1       Running   0          14m
kibana-logging-7f7b9698bc-rrnw6       1/1       Running   0          14m
kube-state-metrics-5bccdf746f-fhv7t   4/4       Running   0          12m
node-exporter-w9jlq                   2/2       Running   0          14m
node-exporter-wgv2j                   2/2       Running   0          14m
prometheus-system-0                   1/1       Running   0          14m
prometheus-system-1                   1/1       Running   0          14m
모니터링 리소스도 확인한다. 위의 리소스를 보면 Fluentd가 배포되지 않은 상태이므로 DaemonSet으로 동작할수 있도록 아래와 같이 설정하면 DaemonSet을 확인할 수 있다.
$ kubectl label nodes --all beta.kubernetes.io/fluentd-ds-ready="true"
Build에서 사용할 Docker Credential 설정
일단 Knative Build를 수행할때 일반적으로 Container Registry를 많이 사용하기 때문에 Registry Credential 설정을 해야한다.
ECR의 경우 https://github.com/knative/build-templates의 ecr_helper를 사용하면 쉽게 ECR account를 설정할 수 있지만 Serving단계에서 401에러가 나는 이유를 잡지 못해서 일단 Dockerhub를 가지고 진행하였다.
간단한 데모코드는 아래 repository에 미리 작성해놨다.
https://github.com/ddiiwoong/hello-python.git
docker-secret.yaml 을 보면 dockerhub push를 위해 basic-auth를 수행하게 되는데 dockerhub id/password 를 base64로 encoding해서 Secret으로 저장한다.
apiVersion: v1
kind: Secret
metadata:
  name: basic-user-pass
  annotations:
    build.knative.dev/docker-0: https://index.docker.io/v1/
type: kubernetes.io/basic-auth
data:
  # Use 'echo -n "username" | base64' to generate this string
  username: BASE64_ENCODED_USERNAME
  # Use 'echo -n "password" | base64' to generate this string
  password: BASE64_ENCODED_PASSWORD
그리고 ServiceAccount build-bot을 생성하기 위한 yaml (sa.yaml)를 작성한다.
apiVersion: v1
kind: ServiceAccount
metadata:
  name: build-bot
secrets:
  - name: basic-user-pass
위에서 작성한 Secret(basic-user-pass)과 ServiceAccount(build-bot)를 배포한다.
$ kubectl apply -f docker-secret.yaml
secret "basic-user-pass" created
$ kubectl apply -f sa.yaml
serviceaccount "build-bot" created
저장된 Secret(basic-user-pass)과 ServiceAccount(build-bot)를 확인한다.
$ kubectl get secret
NAME                        TYPE                                  DATA      AGE
basic-user-pass             kubernetes.io/basic-auth              2         2h
build-bot-token-gfkg9       kubernetes.io/service-account-token   3         2h
builder-token-kp7ww         kubernetes.io/service-account-token   3         10h
default-token-9cpp5         kubernetes.io/service-account-token   3         10h
ecr-creds                   kubernetes.io/basic-auth              2         10h
istio.build-bot             istio.io/key-and-cert                 3         2h
istio.builder               istio.io/key-and-cert                 3         10h
istio.default               istio.io/key-and-cert                 3         10h
istio.knative-serve         istio.io/key-and-cert                 3         2h
knative-serve-token-9j82l   kubernetes.io/service-account-token   3         2h

$ kubectl get sa
NAME            SECRETS   AGE
build-bot       2         2h
builder         2         10h
default         1         10h
knative-serve   2         2h
Python 코드 및 Dockerfile 작성
TARGET 환경변수를 받아서 Hello World와 같이 출력하는 간단한 Flask기반 앱을 작성한다.
간단한 데모코드는 아래 repository에 미리 작성해놨다.
https://github.com/ddiiwoong/hello-python.git
import os

from flask import Flask

app = Flask(__name__)

@app.route('/')
def hello_world():
    target = os.environ.get('TARGET', 'NOT SPECIFIED')
    return 'Hello World: {}!\n'.format(target)

if __name__ == "__main__":
    app.run(debug=True, host='0.0.0.0', port=int(os.environ.get('PORT', 8080)))
위 앱(app.py)을 배포하는 Dockerfile을 작성한다.
FROM python:alpine

ENV APP_HOME /app
COPY . $APP_HOME
WORKDIR $APP_HOME

RUN pip install Flask

ENTRYPOINT ["python"]
CMD ["app.py"]
Knative Build
미리 Dockerhub에서 hello-python repository(docker.io/ddiiwoong/hello-python)를 생성한다.
그리고 위에서 생성한 build-bot 계정과 image tag hello-python정보를 Build template에 작성하여 배포한다.
아래 Knative Build 과정은 kaniko executor를 사용하여 다음과 같은 과정을 수행한다.
spec.source에서 Source Clone (git)를 수행하고 이후spec.steps에서 Docker Build, Tag, Registry Login, Push를 수행한다.
apiVersion: build.knative.dev/v1alpha1
kind: Build
metadata:
  name: python-build
spec:
  serviceAccountName: build-bot
  source:
    git:
      url: https://github.com/ddiiwoong/hello-python.git
      revision: master
  steps:
  - name: build-and-push
    image: gcr.io/kaniko-project/executor:v0.1.0
    args:
    - --dockerfile=/workspace/Dockerfile
    - --destination=docker.io/ddiiwoong/hello-python:latest
build를 수행한다.
$ kubectl apply -f build.yaml
build.build.knative.dev/python-build created

$ kubectl get build
NAME           SUCCEEDED   REASON    STARTTIME   COMPLETIONTIME
python-build   True                  18m
정상적으로 Build가 완료되면 Dockerhub에 정의한 TAG(ddiiwoong/hello-python)로 이�미지가 등록된걸 확인할 수 있다.
$ docker pull ddiiwoong/hello-python
Using default tag: latest
latest: Pulling from ddiiwoong/hello-python
e7c96db7181b: Pull complete
799a5534f213: Pull complete
913b50bbe755: Pull complete
11154abc6081: Pull complete
c805e63f69fe: Pull complete
6eabcf0f7a50: Pull complete
74101057f4ec: Pull complete
Digest: sha256:51dc4a7ce38a5e7894adcfc00eaee6c5ea6aca1ef6c7521f9b7ea6382c013b9b
Status: Downloaded newer image for ddiiwoong/hello-python:latest
Knative Serving 으로 배포
service.yaml
apiVersion: serving.knative.dev/v1alpha1
kind: Service
metadata:
  name: helloworld-python
  namespace: default
spec:
  runLatest:
    configuration:
      revisionTemplate:
        spec:
          container:
            image: ddiiwoong/hello-python:latest
            env:
            - name: TARGET
              value: "Python Sample v1 with Knative on EKS"
빌드된 image (ddiiwoong/hello-python:latest)로 Knative Service를 생성한다.
$ kubectl apply -f service.yaml
service.serving.knative.dev/helloworld-python created
istio-system Namespace에 istio-ingressgateway Service를 확인한다.
kubectl get svc istio-ingressgateway --namespace istio-system
NAME                   TYPE           CLUSTER-IP      EXTERNAL-IP                                                                    PORT(S)                                                                                                                   AGE
istio-ingressgateway   LoadBalancer   10.100.208.80   a220723d475df11e980220a02e220b34-2021915778.ap-northeast-2.elb.amazonaws.com   80:31581/TCP,443:31490/TCP,31400:30367/TCP,15011:32495/TCP,8060:31418/TCP,853:30310/TCP,15030:32405/TCP,15031:31410/TCP   13h
ALB: a220723d475df11e980220a02e220b34-2021915778.ap-northeast-2.elb.amazonaws.com
위와 같이 AWS LoadBalancer로 배포면 ALB가 자동으로 생성되므로 추후 eksctl로 클러스터를 삭제하기 전에 반드시 LoadBalancer 형태로 배포된 서비스를 삭제하고 진행해야 한다.
Knative Service를 확인한다.
$ kubectl get ksvc
NAME                DOMAIN                                  LATESTCREATED             LATESTREADY               READY     REASON
helloworld-python   helloworld-python.default.example.com   helloworld-python-4rw95   helloworld-python-4rw95   True
위에서 얻은 두가지 정보(LoadBalancer, Domain)로 생성된 app을 테스트한다.
Knative는 내부적으로 example.com이라고 하는 기본 domain을 사용하므로 내부적으로는 helloworld-python.default.example.com으로 curl을 실행하게 된다.
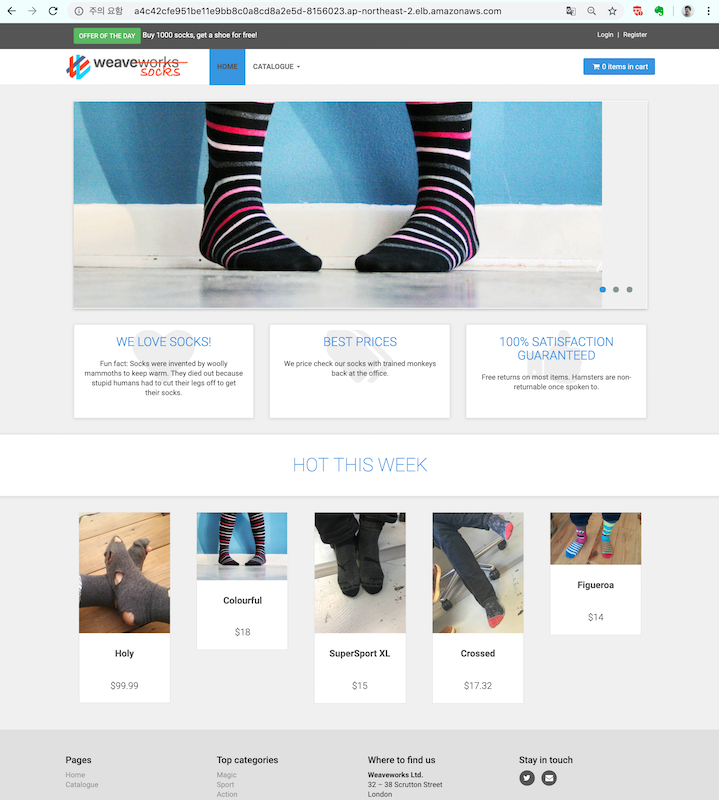
$ curl -H "Host:helloworld-python.default.example.com" http://a220723d475df11e980220a02e220b34-2021915778.ap-northeast-2.elb.amazonaws.com
Hello World: Python Sample v1 with Knative on EKS!
Cold Start(default timeout 5분) 때문에 잠시 응답이 늦어질 수도 있지만(2-5초) 잠시 기다리면 위처럼 결과를 확인할 수 있다.
정리
위에서도 잠깐 언급했지만 Lambda나 ECS, Batch 서비스가 있는데 Knative on EKS 를 구지 왜 하느냐라고 궁금해하는 분들이 계실지도 모른다. 하지만 다들 아래와 같은 고민을 해봤을거라 생각한다.
컨테이너와 Kubernetes가 DevOps도구로서의 표준이 되어�가는 시대에 Lambda를 쓸지 오픈소스를 쓸지에 대한 고민은 결국 이식성과 벤더 종속성을 제거하고 운영효율화 측면에서 그 답을 찾을수 있을것 같다.
현재 몸담고 있는 최근 프로젝트에서 Lambda, ECS, Batch 등을 사용하는 경우가 많아졌는데 실제 엔터프라이즈에서 정해진 자원내에서 정해진 일을 할때는 매니지드 서비스가 적합하다고 생각한다. 하지만 On-Premise 또는 그에 준하는 Kubernetes 클러스터를 운영하는 조직에서는 Knative를 사용하여 컨테이너 기반 서비리스 워크로드를 구현하는 것이 향후 Hybrid 관점에서 확장성과 벤더 종속성을 제거하는데 큰 도움이 될것이라 생각한다.
조금씩 Kubernetes 및 생태계 Learning에 대한 피로도가 증가하고 있고 Hype Driven Development(설레발 주도개발)가 되는것 같아서 아쉬운 부분은 있지만 현재 가장 핫한 기술이고 관심도가 높기 때문에 배워두면 언젠가는 써먹게 될거라 확신한다.
다시한번 Conference driven development(architecture)가 되지 않도록 자중하고 Loudest Guy가 되지 않도록 조심해야할 것 같다.